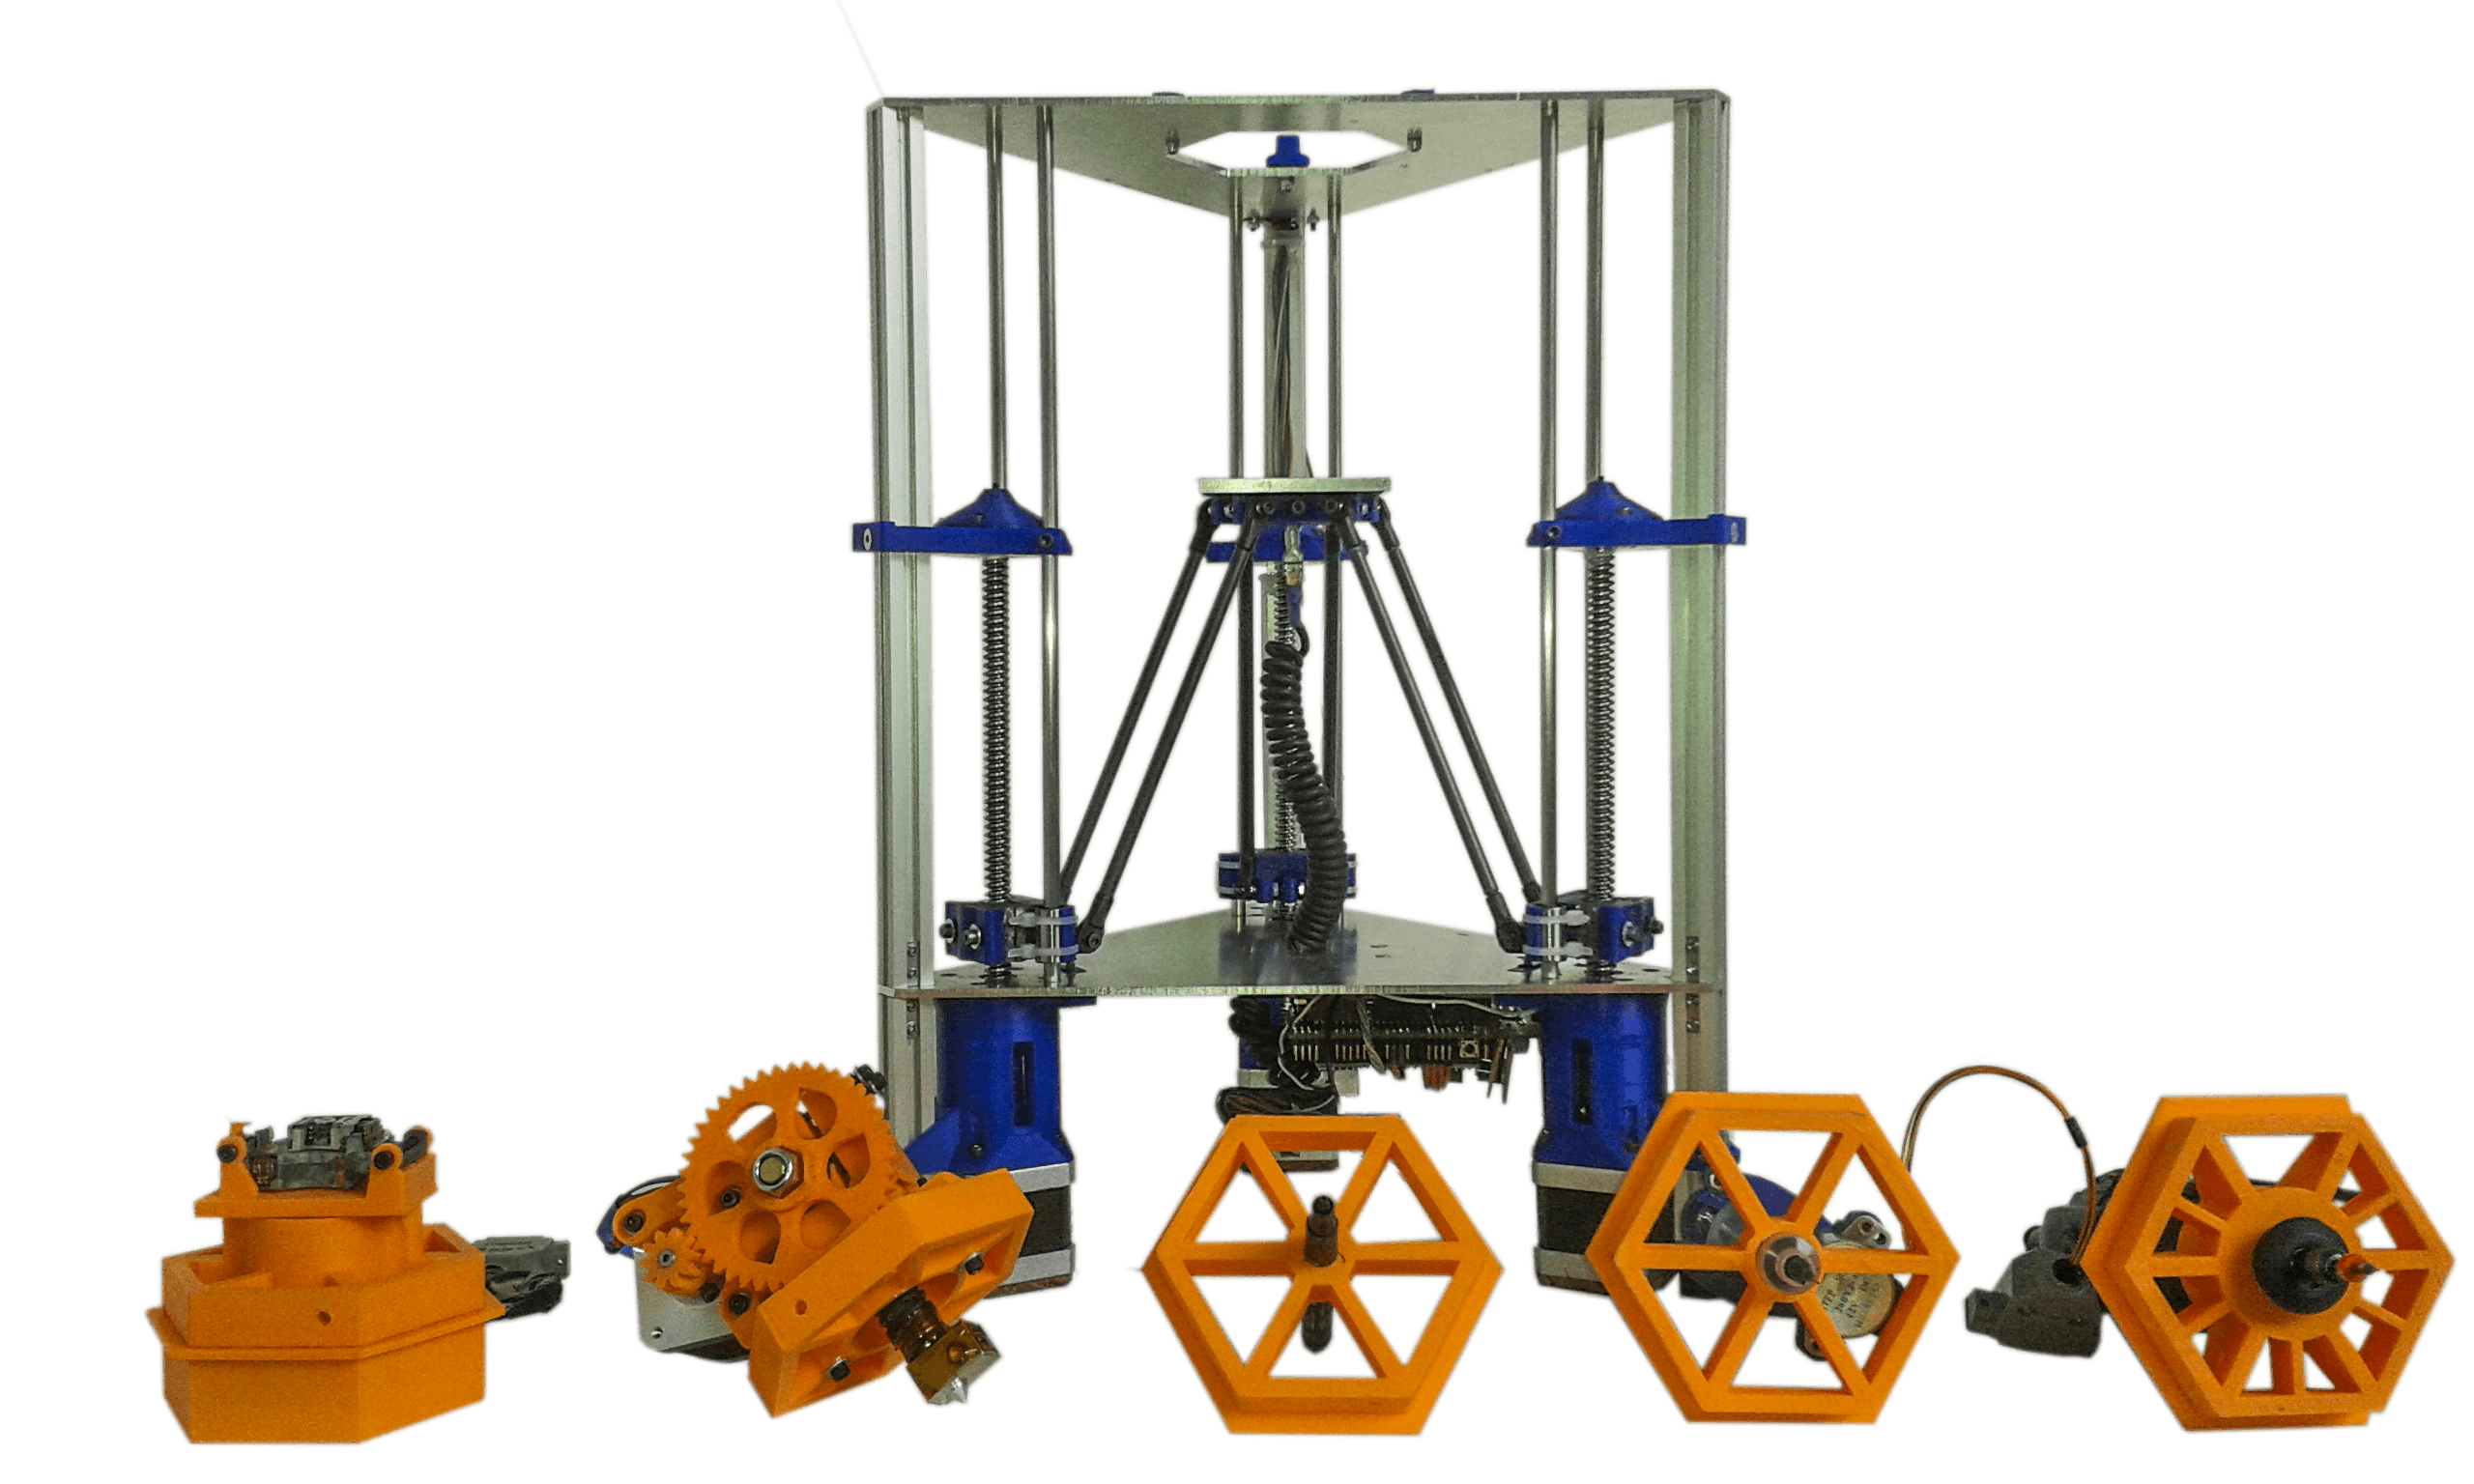
Diyouware TwinTeeth: The PCB mini-factory
TwinTeeth Plus and the various toolheads supported
TwinTeeth Basic and Plus are open-source PCB mini-factories targeted to the electronic hobbyists. They are innovative fabricators of Arduino™ shield-size PCBs which help you to make PCB prototypes at home and learn a lot about mechatronics.
It includes the following functions:
- UV Laser photoengraving on sensitive film or presensitized boards using an ultraviolet laser.
- Drilling vias and holes using any mini-rotary tool like Dremel® or Proxxon®.
- Dispensing solder paste with precision on SMD PCB pads.
- Plotting circuits with a permanent marker pen (if you prefer this method).
- 3D printing knobs, casings, front-panels, even print circuits with conductive filament, or make circuits supports.
- Milling/Carving soft materials or etching PCB copper with a v-bit (if you prefer this etching method).
- And much more… because it is extendable and you can use any other tool you can fix on it.
Diyouware TwinTeeth comes with interchangeable Toolheads which automates the processing of most PCB fabrication stages. They are fixed at the top of the robot and it is easy to interchange them.
While traditional 3D printers or CNC machines move the tool while the working piece is fixed on the bed, TwinTeeth moves the bed while the tool is fixed. The first method is good if the tool is small and you want to make large pieces. But if the tool is heavy like a mini-rotary tool or a 3D extruder and the piece you are working on is light like a PCB, it is better to move the piece because it provides more precision and reduces vibrations.
TwinTeeh uses the PHR-803T blu-ray pickup we hacked last year. It is a masterpiece of engineering which includes three laser diodes: UV 405nm, Red 650nm and IR 780nm, focus lens, coil servos and a photodiode array which TwinTeeth uses to auto-focus the laser with precision on the PCB.
Inspiration
Last year we fought with mechanical vibrations and belt resonances when we developed DiyouPCB. When we began TwinTeeh project we were afraid of not finding a free-vibration mechanical design because we tried almost everything to avoid vibrations.
Belt resonances can be avoided using lead-screws. This was the base of our new design. But we didn’t have a clear idea about how to eliminate other kind of vibrations, mainly produced by motors and linear bearings.
It is very important to avoid any kind of vibration when drawing with a UV laser because the beam is very fine (aprox. 620 nm) and any tiny motion would move it and distort the drawing.
Inspiration arose from my twin babies when they tried to brush their teeth for the first time. One of them was brushing his teeth in the normal way but the other one thought it was easier to move the head instead the brush. Why not?
I immediately thought that maybe we might avoid vibrations if we maintain the laser fixed while moving the PCB. And it works! So we called the project “TwinTeeth” to remember that day.
Fixing the tool on the top of the robot has other benefits: we can interchange it very easily because it is not attached to any moveable part. Also because the robot doesn’t have to move wirings, filaments, heavy loads, cable chains, etc.
Technical specifications
- Working area (X,Y,Z): 70x80x60mm We reduced it considerably to an “Arduino™ shield-size” because we preferred to do something small but precise. We rarely create big circuit boards and reducing the working area has some benefits: the robot is cheaper, more precise, more robust, smaller and more manageable. However, it’s scalable, so you can make it bigger if you want.
- Motion: TwinTeeth is powered by three Nema 17 motors, lead-screws and anti-backlash nuts.
- Speed: it can go as fast as 1200-1500mm/min.
- Code: it supports G-Code, postscript and BMP files. Eagle CadSoft can export to postscript format very easily. Support BMP files means than in addition to PCBs it can also print and etch photos on copper, alu or bronze.
- Laser: we are using the same PHR-803T optical pickup than DiyouPCB with a wavelength of 405nm.
- Rastering: the robot draws the PCB circuits in rastering mode in a similar way any paper printer does: moving the laser (or the bed in our case) from one side of the printer to the other.
- Resolution: In rastering mode we are printing at 600DPI resolution. The laser beam spot is approx. 0.04 wide when is focused. Incredibly thin! Theorically mechanical precision is 0.94um.
- Auto bed-levelling – it keeps the bed flat with a tolerance of less than 0.01mm while the robot is moving. It’s very important to improve printing quality and provide precision.
- Auto-Focus: - small focus differences on the PCB surface affect printing quality so we implemented a robust focusing system which takes some points on the PCB and extrapolates the results with a bilinear equation. With that info the robot adjusts the focus automatically while printing.
- Infrared focusing: the auto-focus system uses an infrared laser to avoid film blurring. Films or presensitized boards are only sensible to ultraviolet light.
- Electronics – we are using the well known combination of Arduino™ Mega + RAMPS 1.4 + A4988 Motor Drivers. We also improved the Pickup Driver Circuit we developed for DiyouPCB and now it includes new features.
- Precision fixture bed – it is very important to keep the PCB fixed to the bed while the robot is moving. Also, when printing two-sided PCBs we have to be sure that both sides are correctly aligned. TwinTeeth includes a precision aluminium fixture bed and dowel pins which allow correct fixing and positioning of the PCBs. A stencil is also included which helps to drill the PCB’s 4-positions holes.
- Camera – we included a small USB camera because it is difficult to see tiny details on high-density PCBs. The camera is also useful to set the home position which is very important to obtain accuracy.
- 3D Printing: we use FFF (Fused Filament Fabrication) with 1.75mm PLA/ABS and a 0.35mm extrusion nozzle. Printing quality is similar to any 3D printer you can find in the market.
Software
We developed a complete software suite for the mini-factory.
- TwinTeeth Firmware: we deeply modified Marlin firmware to support multiple tools, manage and control the laser, implement the auto-focus system, print in rastering mode, improve the buffering, and much more.
- TwinTeeth Management Console – TwinTeeth comes with a new easy-to-use management console which includes functionality specially designed for the multi-tool environment. We also included functions to calibrate the printer, move the axis (jogging), and adjust the parameters of each tool. This software communicates with the robot through an USB 2.0 port.
- TwinTeeth Eagle ULPs – we developed some ULPs (Eagles’s user language programs) to generate the drilling and paste dispensing g-code files. You can also use the files generated by other ULPs like PCBCode.
- Eagle Cadsoft – It is a popular electronic CAD software company. They provide a freeware version for non-commercial use. It easily generates the postscript, drilling and solder paste dispensing files which TwinTeeth uses to make the circuits.
- 3D Slicing software– for 3D printing you can use any slicer software like Slic3R or Cura.
TwinTeeth Management Console
It is the PC side software which allows you managing and controlling TwinTeeth. It was developed on Java using Processing development environment.
It includes the following funcionalities:
- Connect/disconnect with the robot using any USB port.
- Tool tabs – select the tool which you want to use.
- Homing – move the bed to the bottom position
- Goto zero – go to the homing position (X0,Y0,Z0) for this ToolHead.
- Center X/Y – center the x/y axis.
- Jogging – manually moving the robot bed on the X,Y,Z axis.
- Setting speed – seek rate of X/Y and Z axis.
- Z min – Set the Z min position for a particular tool
- Calibrating the robot – setting the program zero position, running the bed auto-leveling, resetting the tool config.
- Running – open a Postcript, BMP or g-code file and run the job.
- Stopping/Pausing/Resume – controlling the evolution of the job.
- Panic Button – quickly stop the robot by emergency.
- 3D Graphic Window –it shows a 3D view of the evolution of the job. It’s possible to zoom, tilt, rotate, etc. the image.
- Dialog window – shows information and important messages to the user.
- Camera view – a window to the USB camera. Very useful for homing and inspecting the job.
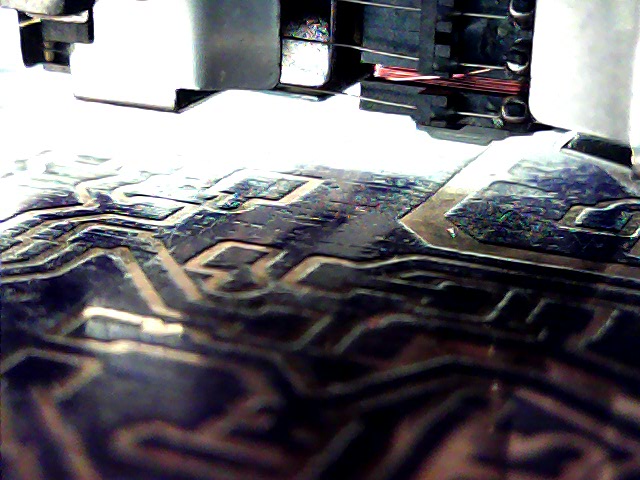
Each tool tab represents a different environment with the functionality and parameters which corresponds to each Toolhead.
For instance, if you select the laser Toolhead the parameters available are: activate laser source (red, IR, UV), turn the laser on/off, modify the laser power, focus it, etc.
In the 3D printing Toolhead (picture below) the parameters are different: adjust/check the hot-end temperature, extrude or retract some filament or change the extruder speed.
Toolheads
We call “Toolhead” the tool adapter needed to install a tool on TwinTeeth. These adapters use a custom hexagon 3D printed part and also stepper motors, electronics, linear bearings or just a Dremel rotary tool (It depends on the Toolhead). The Toolhead is connected to the robot through a “bus connector”. It is a cheap DB15 connector which carries all the signals and power supply lines between the TwinTeeth CPU and the toolhead.
The firmware and the management console support also this multi-toolhead environment. Each ToolHead has its own configuration, parameters, calibration and even home position.
Anybody can design a new Toolhead and 3D print it. Additionally we can create for you a new one if you send us the specifications.
Till today we had designed the following toolheads:
Laser Toolhead
It basically prints circuits boards on dry-film or presensitized boards with an ultraviolet laser. It is based on the famous PHR-803T blu-ray pickup that we hacked last year and was used to build DiyouPCB.
In this project we were focusing on improving the functionality of the Pickup Driver electronics, isolating it from the Arduino™ UNO (in order to use it with any other CPU board), reducing electric noise (which affected the focus signal), controlling the red and IR laser diodes (to focus with them and avoid film blurring), and much more.
We made some versions of the new driver at a professional factory to see if we could reduce its size and improve the printing quality reducing the noise. The actual version 3.3 works really fine. It focuses precisely with the IR laser on the PCB and prints with the UV laser with a very thin spot.
On the software side we implemented a new printing method based on laser rastering instead of vectorial printing.
Vectorial printing is the method used by 3D printers or plotters interpreting g-code or hp-gl. It’s good for printing or etching lines but it can be really slow filling polygons like GND areas. Raster printing is the method that paper printers uses.
In raster printing TwinTeeth supports Postcript or BMP files. TwinTeeth uses g-code files in vectorial printing/moving with the rest of the tools (drilling, solder paste dispensing, 3D printing, etc.) Eagle Cadsoft generates easily both formats. Postscript is generated directly from the Eagles’s CAM processor. G-code is generated through an ULP (User Language Program) script. We developed some of them to generate drilling and solder paste dispensing files. You can also use PCB-Gcode: a popular ULP by John Johnson, although we did not test it yet, but we think it will works.
Pickup Driver version 3.3 can turn on/off, focus and control the power of the three laser beams of the pickup. The PHR803-T includes three laser diodes and circuitry: IR laser (780nm), read laser (650nm) and a blue/violet laser (405nm). The laser Toolhead uses the last one to print the PCB and sensitize the UV film. We think there is also IR film available in the market, which is used in professional photoplotters and it might be also used with the IR laser. This laser is also useful to focus the laser on the PCB because the film is not sensible to IR wavelength and we don’t blur the UV film while focusing.
Printing double-side PCBs
TwinTeeth was designed to print double-side PCBs. We developed some special features to help you in this task.
It includes an aluminium fixture bed which makes easier aligning the PCB sides. The bed comes with a stencil to drill the first four PCB holes. You need this stencil to drill them because it is almost impossible to do it with precision without it. Then the PCB is fixed to the bed with four dowel precision steel pins. Once the PCB is on the bed just print one side then turn around the PCB (to the right), fix it again with the pins and then print the other side.
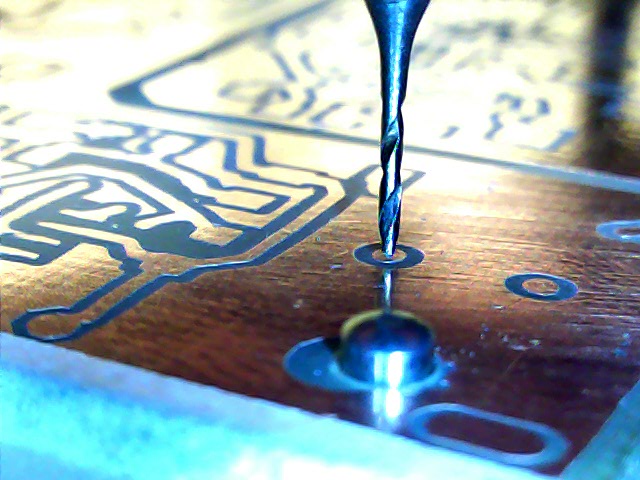
Drilling Toolhead
The drilling Toolhead is very simple but effective. We just designed a custom “hexagon” to support a Dremel® 200: a popular mini-rotary tool, but you or we can modify the designing very easily and adapt it to any other Dremel® model or any mini-rotary tool like Proxxon®.
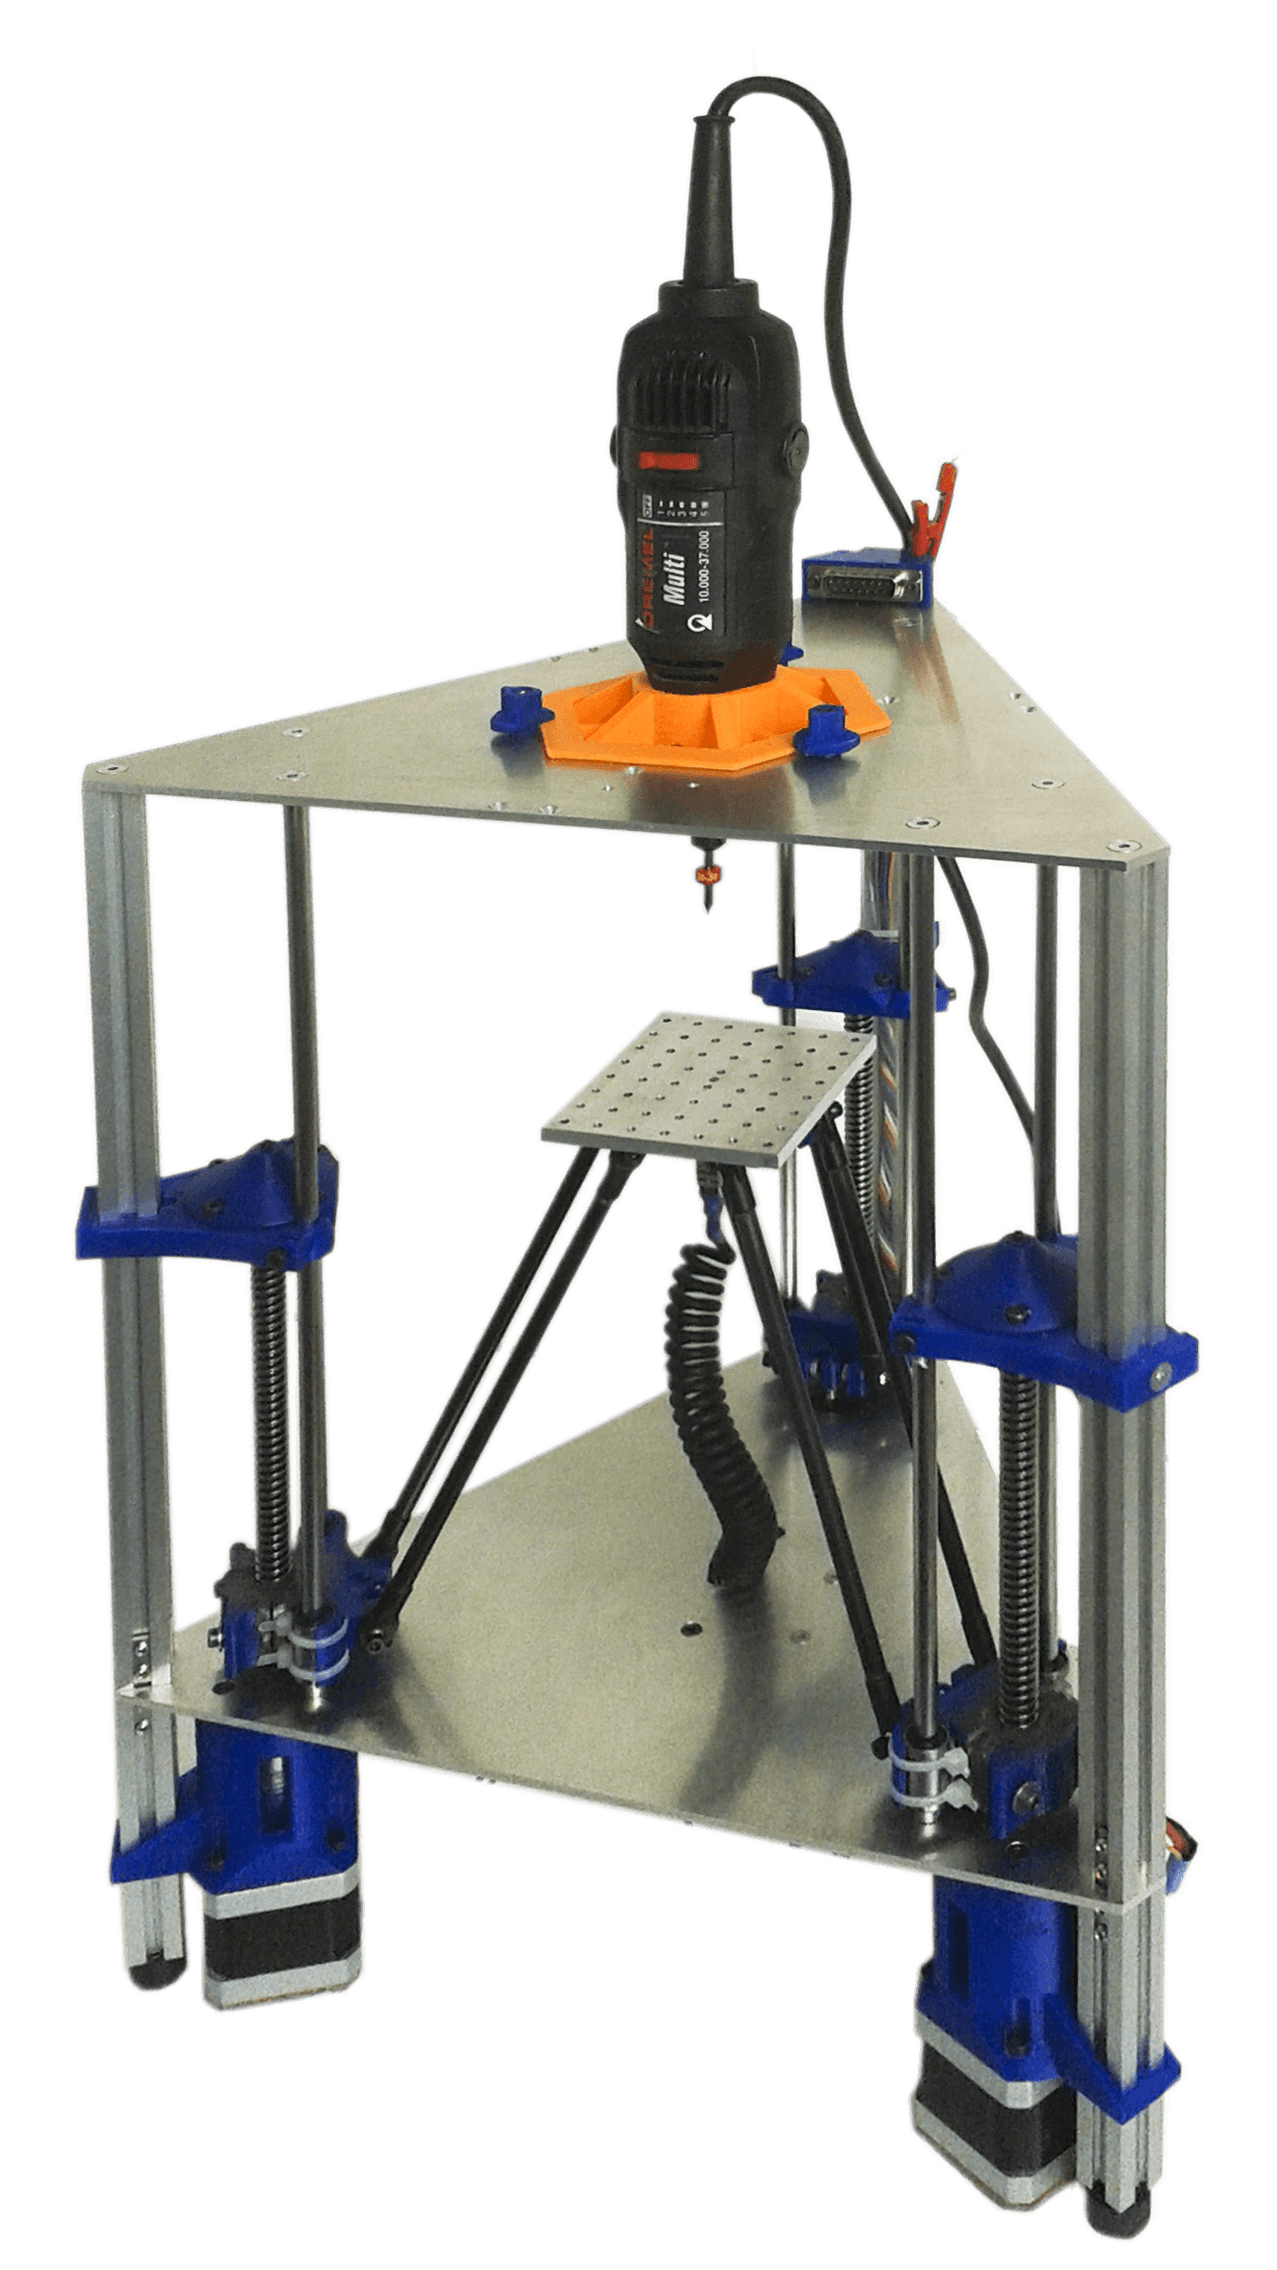
As we said later we developed a special Eagle CadSoft ULP script to generate g-code files from the circuit board. The ULP allows modifying and configuring the different parameters which affect the drilling task as: speed, depth, bits used, side top/bottom, etc. Then it generates a drilling g-code file for each different drilling bit configuration.
The possibility to reuse any mini-rotary tool is important because we don’t have to invest in a new spindle: most of us already have one of these tools.
Solder Paste Dispensing Toolhead
It consists in a luer-lock syringe which is actuated through a special dispenser we designed and moved by a stepper motor. It allows dispensing small solder paste quantities on the SMD PCB pads.
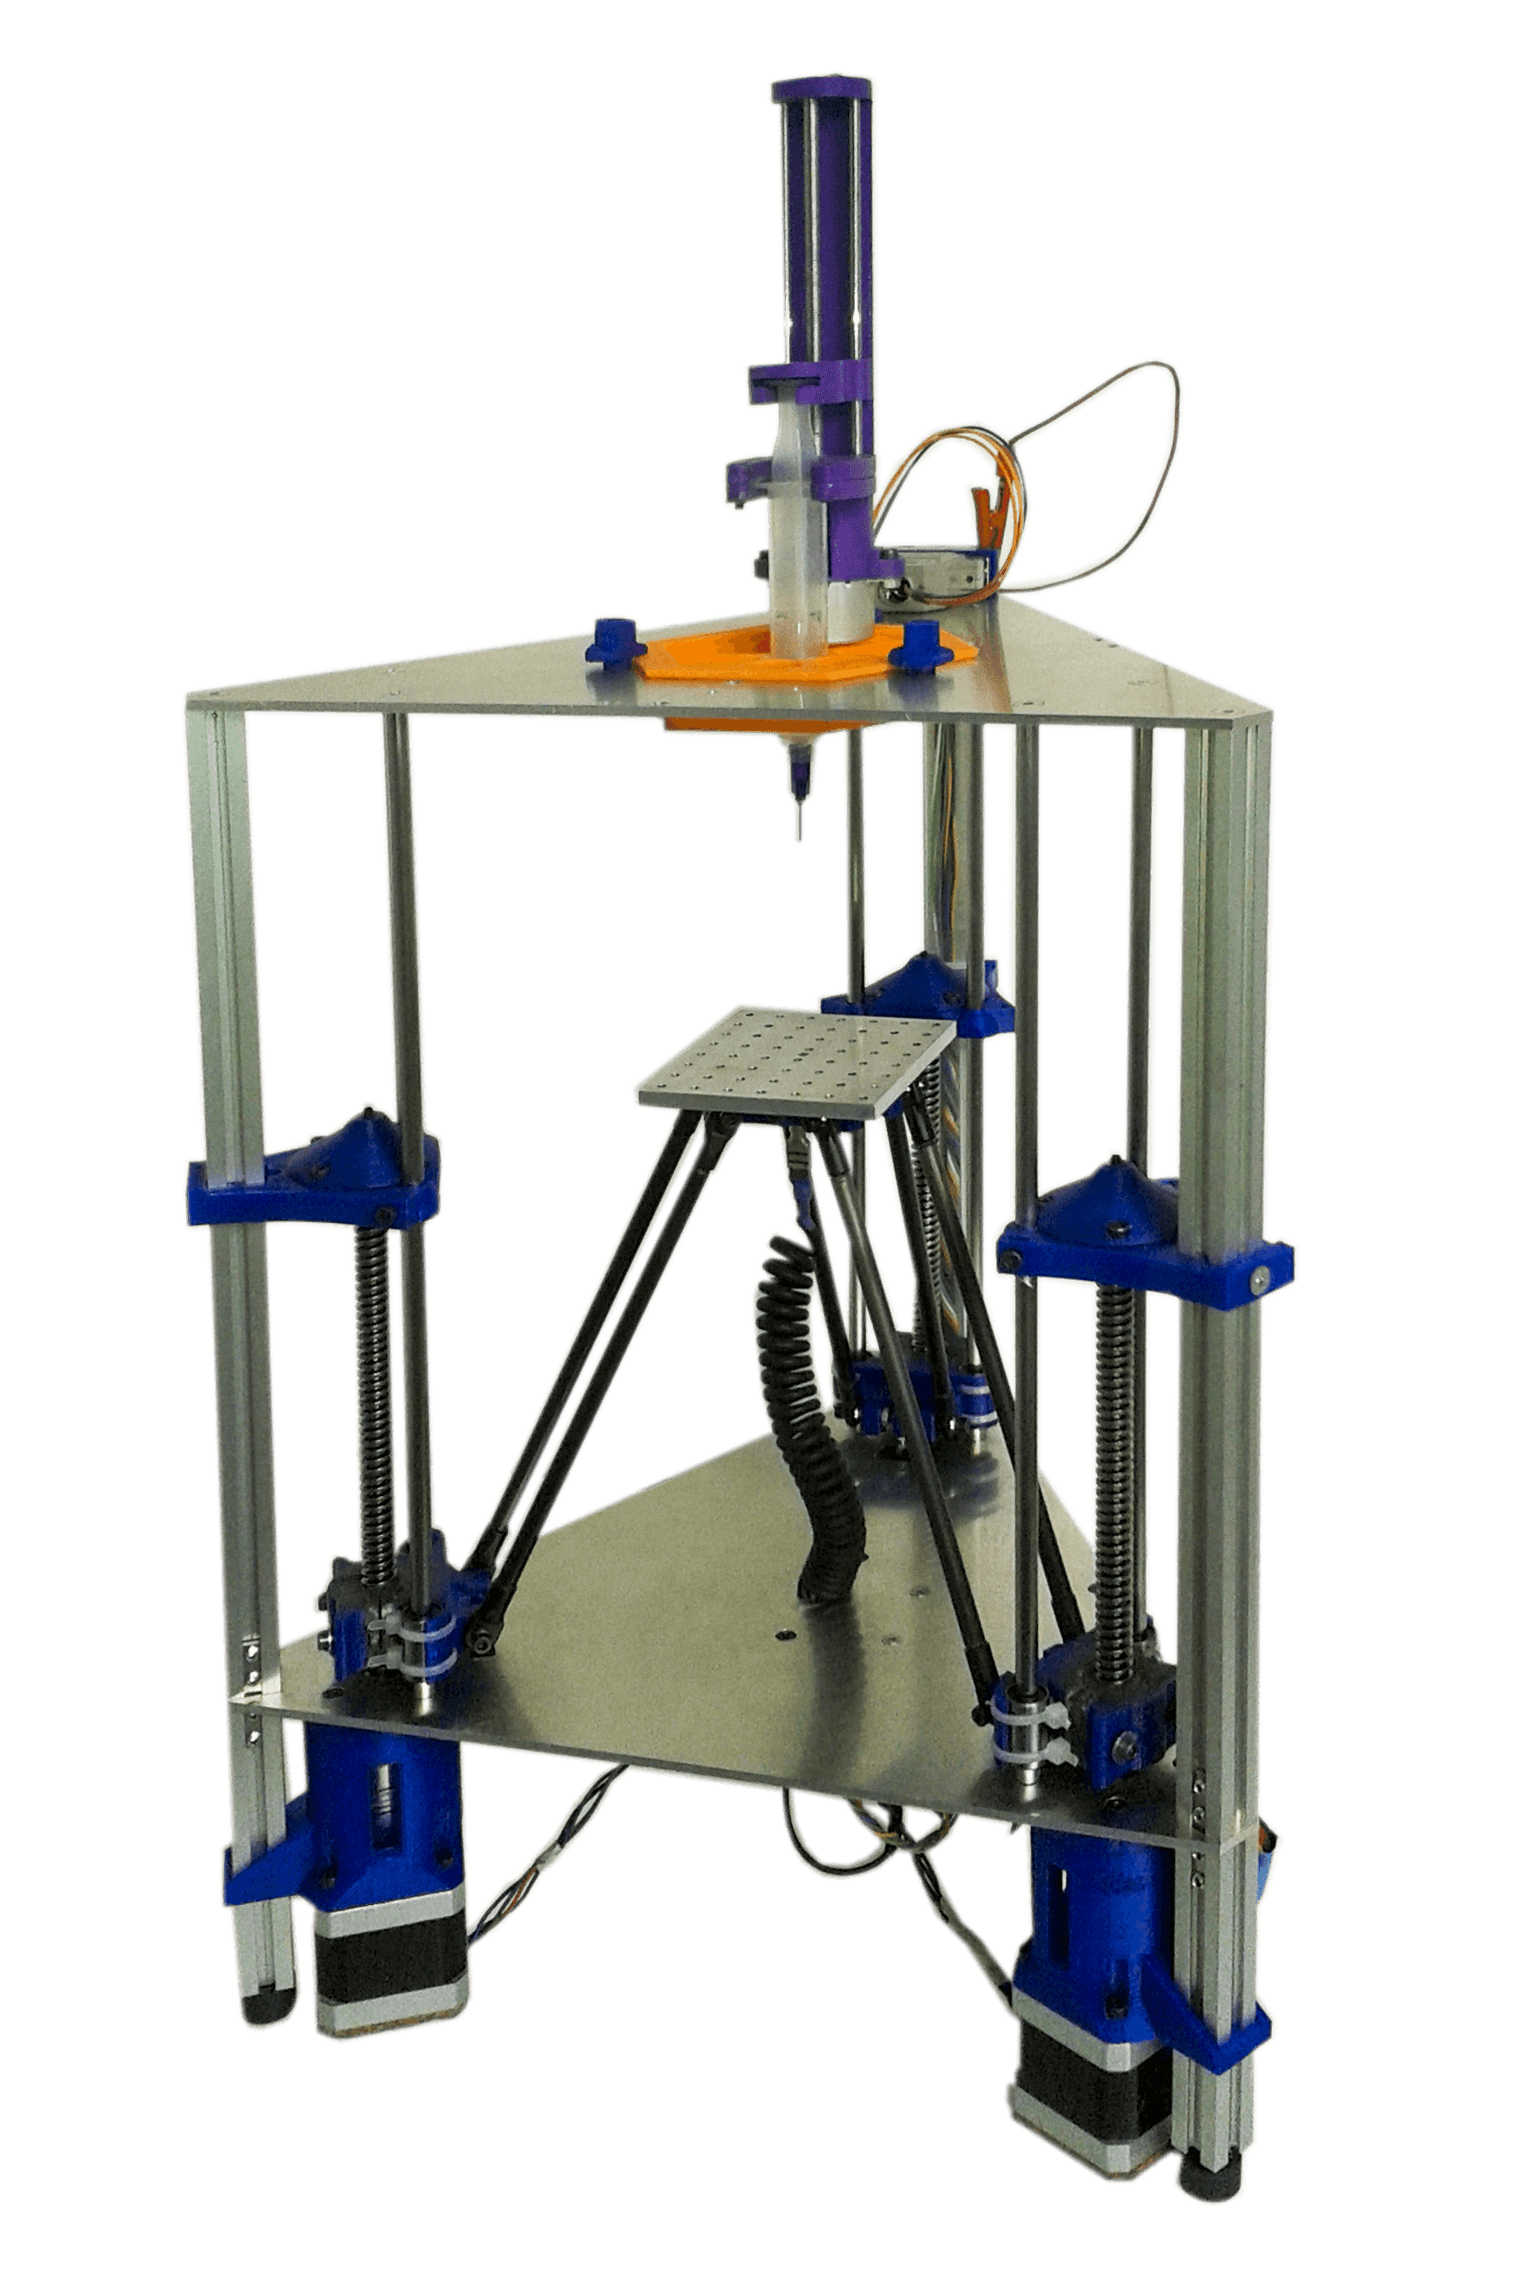
We developed also an ULP to generate the g-code file for dispensing paste. It allows adjusting most important parameters to control the dispensing flow like: rate, dispensing time, retraction length, speed, etc.
TwinTeeth can also 3D print with this dispenser any kind of paste or clay. Even print food like chocolate. (We did not test it yet).
Plotting Toolhead
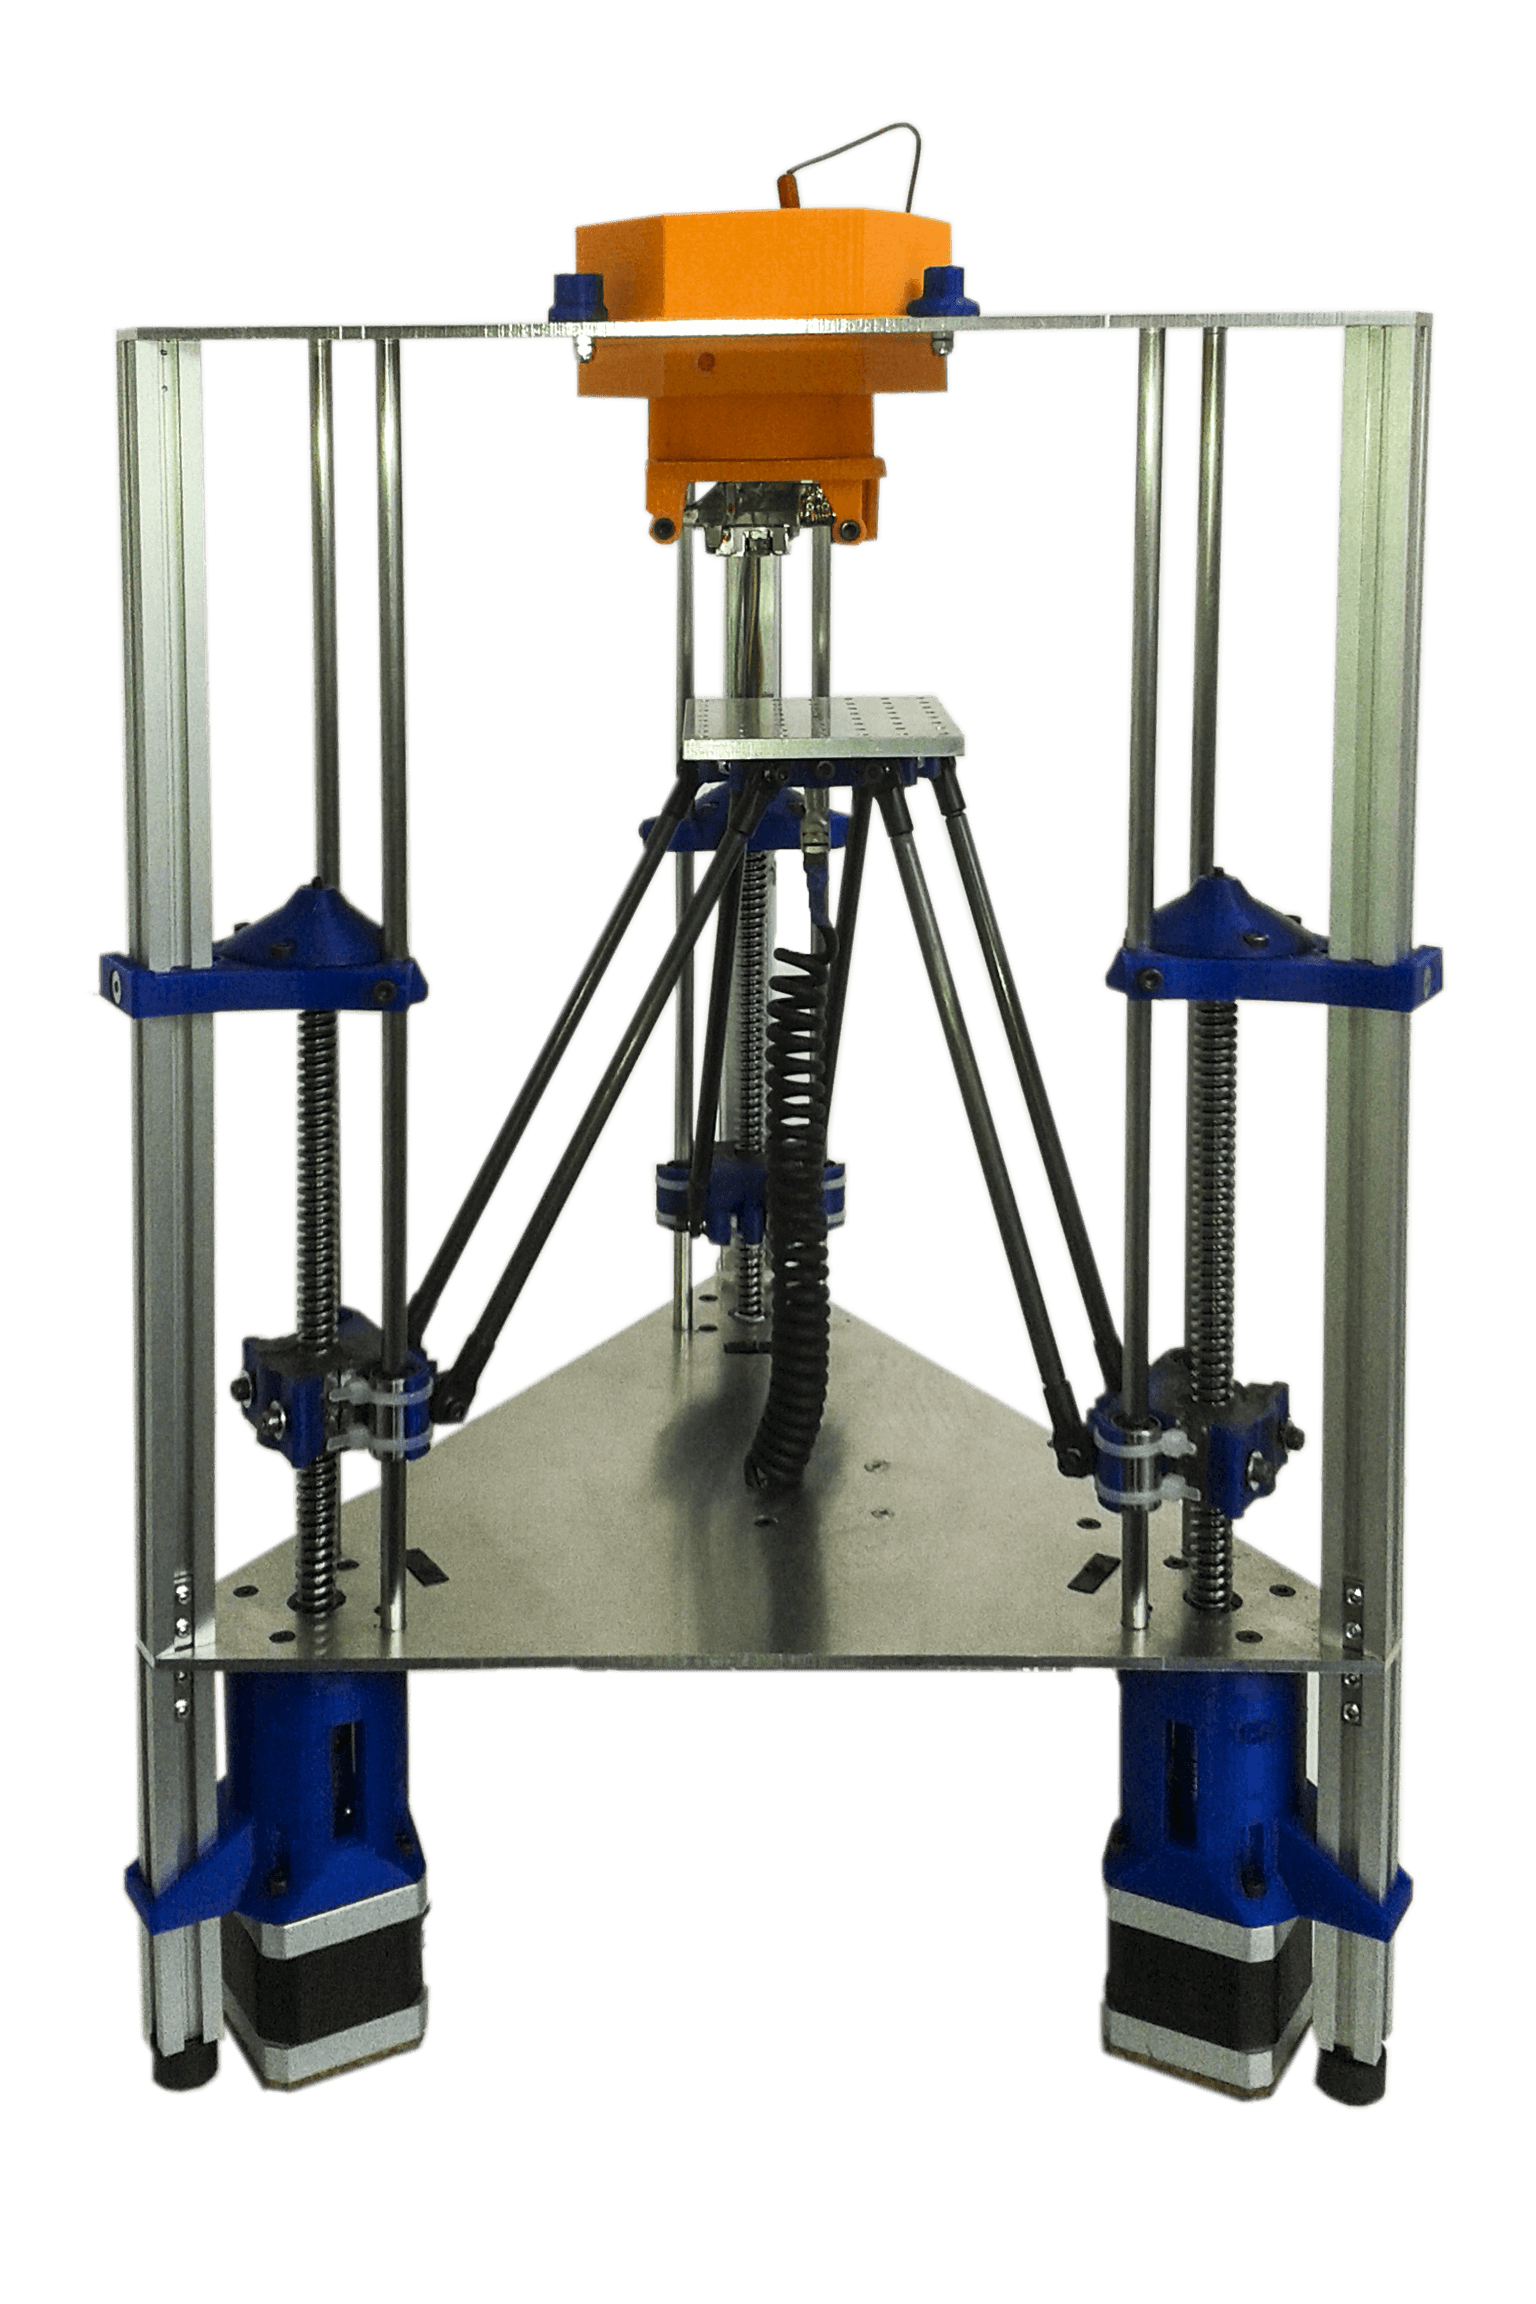
We don’t like this PCB drawing method but we incorporated it to TwinTeeth for some reasons. First because was easy to do it: we just printed a hexagon to hold the marker pen. Then because pen plotting is convenient for testing: we can print on a paper and see how the robot works. Finally, because we also use it to install the auto bed-levelling probe.
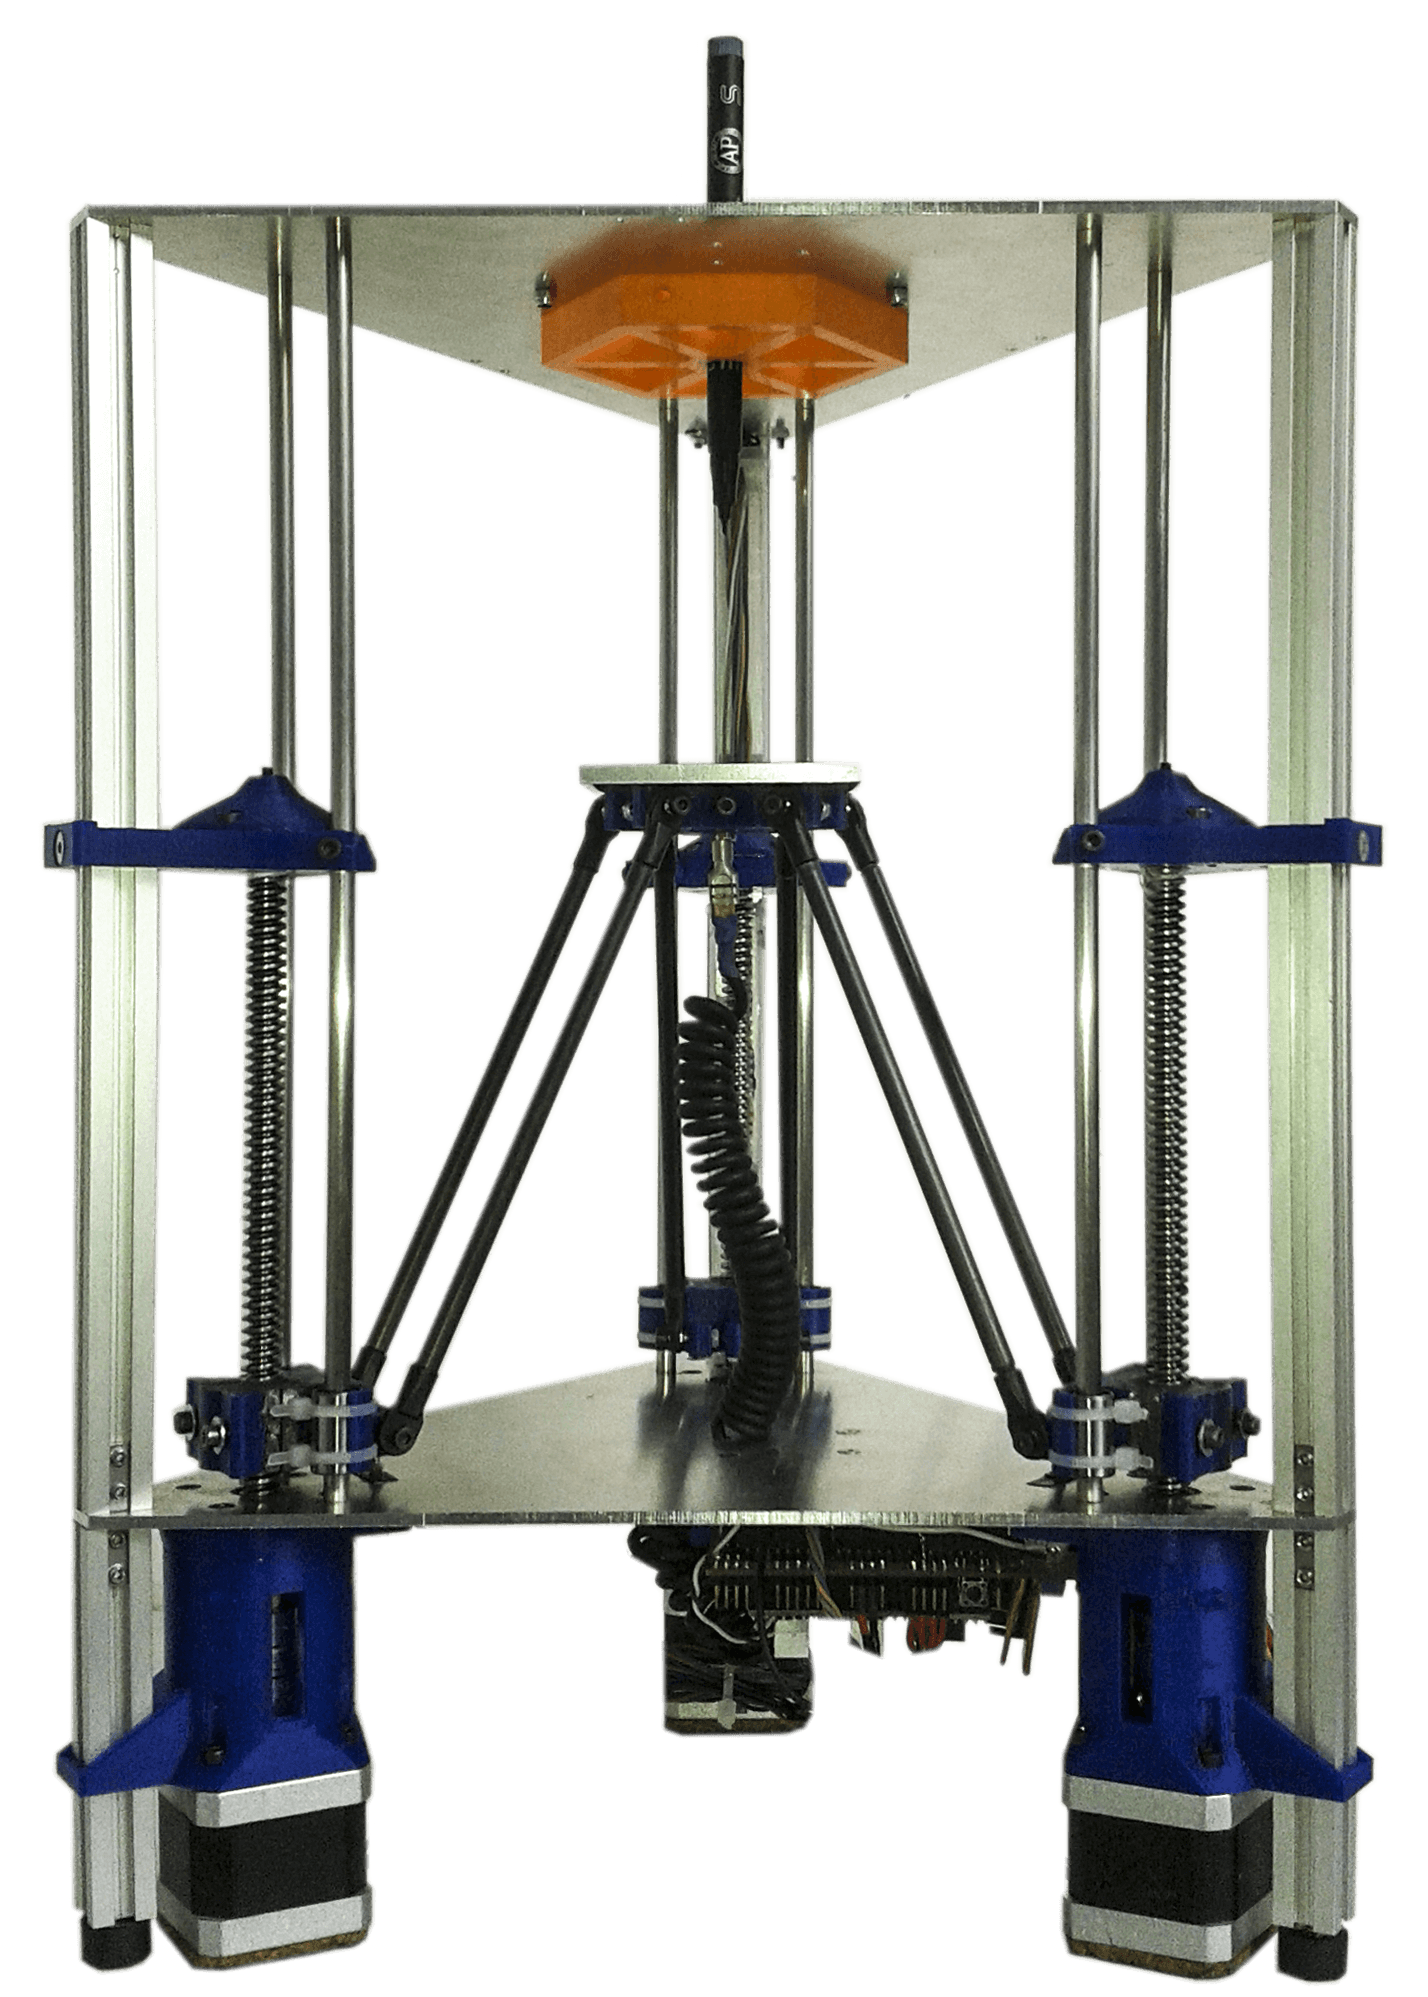
The auto bed-levelling probe is made with a recycled marker pen and a conductive tip which is connected to the CPU board with the red cocodrile clamp you can see at the picture. It closes a circuit when touching the aluminium fixture bed. In that way, the robot can take some “leveling reference points” and know how much has to adjust the bed to levelling it while moving. This reference points are stored on EEPROM memory so we only have to calibrate the robot once and save the configuration. Every time we will turn-on TwinTeeth, the firmware will recover the configuration saved in memory and will use it to level the bed.
3D Printing Toolhead
This toolHead allows to 3D print using the FFF method. You can use any standard 3D printer extruder. We have used the well known combination of Greg’s Extruder and a J-Head hot-end which is thoroughly extended on the RepRap community. The extruder, as the rest of ToolHeads, is connected to the DB15 bus which includes signal lines to control the stepper-motor, the hot-end resistor and the thermistor.
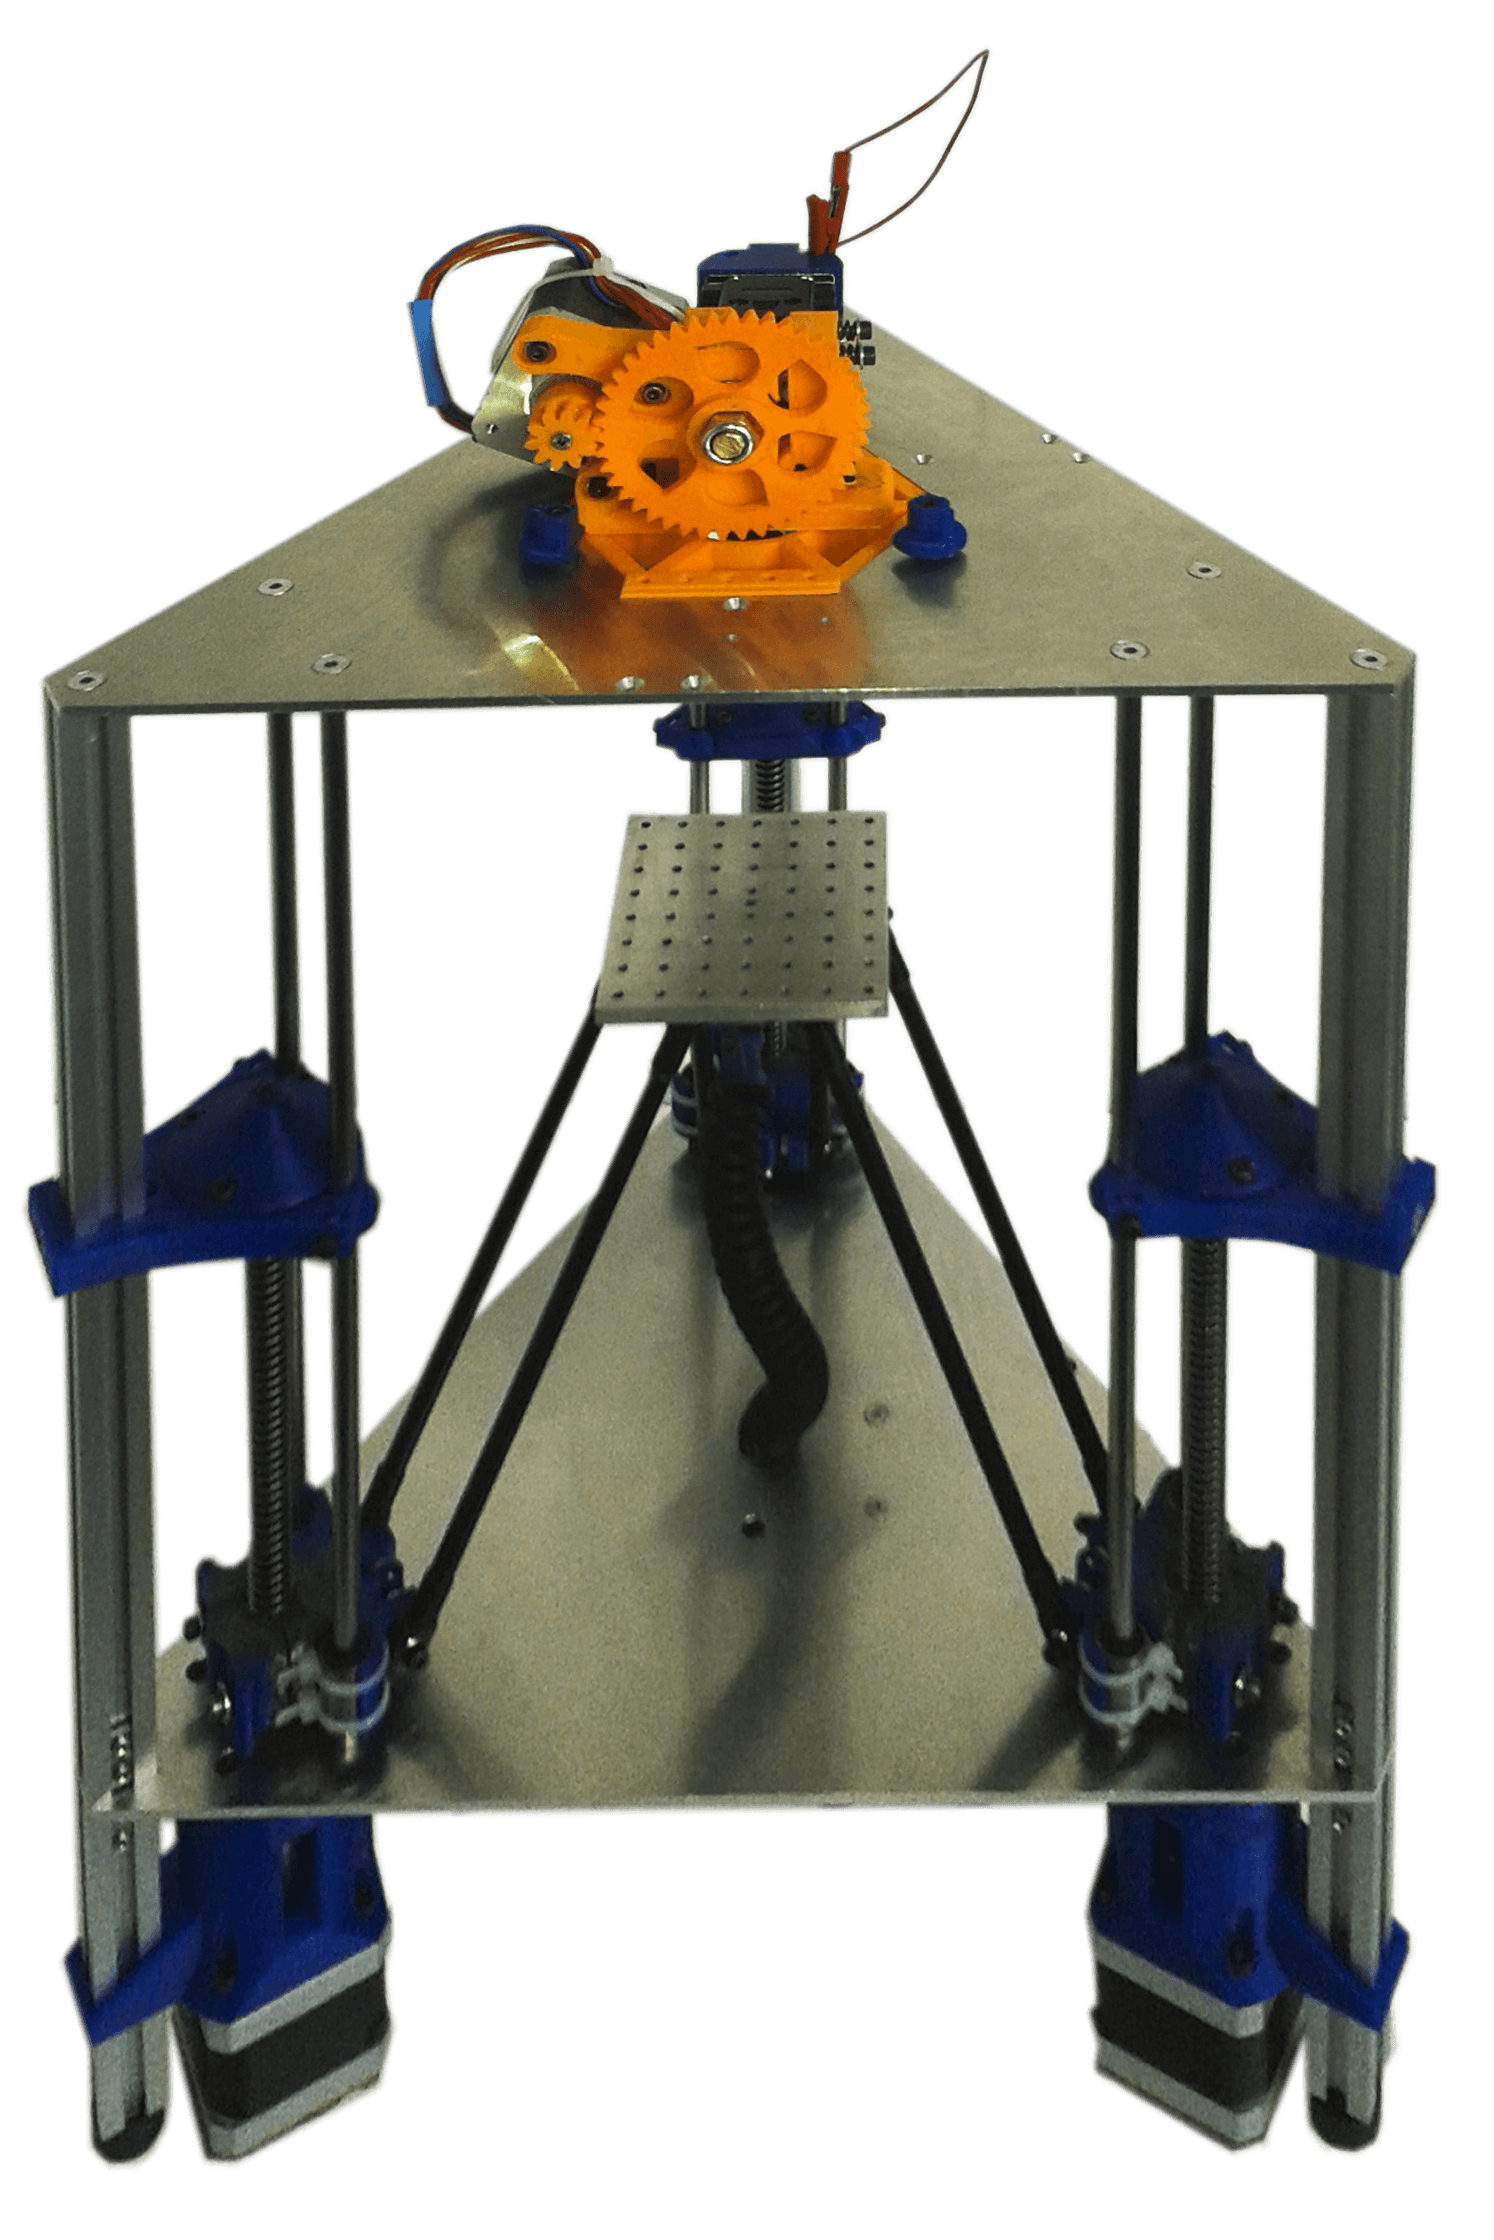
The 3D printer Toolhead is installed on top of TwinTeeth as the rest of Toolheads. This has a big benefit: the mechanics don’t have to move the mass of the extruder and the stepper motor, increasing in that way the precision of the printing.
TwinTeeth Management Console includes functionality to calibrate, feed the filament and control the extruder so you don’t need any other extra tool.
Additional Functions
Mould making
Carving, milling, engraving soft materials like: polystyrene foam, soft wood, moulding wax, plaster, etc. is also possible with TwinTeeth. Just use the mini-rotary tool with the appropriate bit and speed.
PCB etching
If you install the mini-rotary tool with a v-bit you can also etch the copper layer to make the PCB circuit. We prefer the laser photoengraving method because is less invasive and photographic methods always provide more resolution than mechanical but it depends on your taste to PCB dust :-). If you prefer this method you will need to generate the g-code file with PCB-Gcode ULP.
UV resin 3D printing
It is the well known Stereolithography (SLA) method. It consists in 3D printing objects with the UV laser on photo-sensible resin. We already drafted a blue-print using the Laser ToolHead and probably will be our next project. The main benefit respect similar technologies is that the laser will be very close to the resin (less than 10mm) and perfectly focused in a very tiny and precise spot. As we use the IR laser to focus we can directly focus on the object-plate.
Some friends told us that they saw at Las Vegas CES a commercial 3D printer which uses the PHR803-T pickup (and probably our art) to print on resin at nano-scale, so it’s possible to do it.
In our SLA project we will use another benefit of TwinTeeth which is that we can also interchange very easily the fixture bed for any other kind of “bed”. The bed is fixed to the effector with three screws and change it is o easy as loosen them a little and disconnect the spring cable.
Another benefit of TwinTeeth is that it also works facing-down like a normal delta printer or even leaning back on the table. In other words it does not need gravity force to work. (I will stop here and let your imagination run).
Bio-polymer 3D printing
Consists in 3D printing on bio-polymers for tissue engineering. It seems easy: just add a UV photo-initiator to any hydro gel and 3D print on it with the UV laser beam. The benefit to use TwinTeeth could be the precision because the laser beam is perfectly focused and close to the hydro gel surface. There are labs and universities around the world working on using paper laser printers for that but not yet using TwinTeeth and the optical pickup. If you are interested in this research area don’t hesitate to contact us.
TwinTeeth is open-source
TwinTeeth is an open-source project for both: hardware and software. You will find all the blue-prints, bill of materials and source files in the Get it section.
You can distribute, copy and modify it under the terms of the Creative Commons Attribution-NonCommercial 4.0 International License.
To view a copy of the license, visit http://creativecommons.org/licenses/by-nc/4.0/.

We have designed and tested TwinTeeth during almost a year with much effort in the hope that it will be useful to the community, but WITHOUT WARRANTY OF ANY KIND; tacit or implicit to no particular purpose.
Worldwide Spreading
Twinteeh project had an incredible worldwide spreading with more than 190.000 sessions around the world in the last years.
Specials thanks
I would like to thank to the following people who directly or indirectly helped me to create TwinTeeth:
- Marlin Firmware team: Erik van der Zalm and @daid and Johann C. Rocholl for his Marlin modifications.
- Processing team: Ben Fry and Casey Reas
- Andreas Schlegel for his fantastic ControlP5 library.
- Ghostscript and Ghost4J project teams.
- John Johnson developer of PCB-gcode.
- Eagle CadSoft team for his powerful electronic CAD tool.
- Richard Horne (RichRap) who taught me a lot of 3D printing through his blog and also inspired me with his delta 3D printers.
- Heraeus S.A who donated us some solder paste to do the dispensing testing.
- J.L.Carrera my best friend who helped me with the pictures.
And special consideration to:
- Charlie my brother: who worked hard hacking the pickup and designing all the electronics.
- Agnes my wife (for being patient with my passions) and for correcting my English mistakes.
- Victor and Emma who really were the main contributors to the project with their "tooth brushing" creativity.
To all of them, thanks very much!
How to…

